Sunday 27 March 2016

What is SharePoint Provider Hosted App/Add-in?

SharePoint provider-hosted add-ins includes components that are deployed and hosted outside the SharePoint farm. They are installed to the host web, but their remote components are hosted on another server.

SharePoint-hosted add-ins has a fixed hosting pattern, since they are hosted on the add-in web. Provider-hosted add-ins provides more flexibility for hosting the various components of your add-in, so if you choose to create one, you’ll need to match your goals and requirements to the appropriate hosting pattern. One of the most important questions you need to ask when considering provider-hosted add-ins and how you’ll build them is how the add-in will get authorization to interact with SharePoint.

Provider-hosted add-ins gives you two choices:
  1. JavaScript cross-domain library
  2.  OAuth

1. JavaScript cross-domain library:

The cross-domain library lets you interact with more than one domain from the remote components of your add-in through a proxy. If client-side code and the permissions of a user who is signed in to SharePoint are sufficient, the cross-domain library is a good option. The cross-domain library is also convenient whenever you are making remote calls through a firewall.

2. OAuth:

OAuth is an open protocol that enables secure authorization from client applications (desktop, web, and mobile applications) in an easily manageable way. If you plan to build a SharePoint Add-in that runs in a remote web application and communicates back to SharePoint 2013, you will often need to use OAuth. OAuth is required whenever you are calling into SharePoint from a remotely hosted web application that can’t use client-side code (HTML + JavaScript) exclusively.

If you are using Provider-hosted add-in with Azure (Cloud) web deployment and Office 365 then you need Microsoft Azure Access Control Service (ACS) as the trust broker between Azure (Cloud) Web and Office 365 SharePoint site to make it authorize. But if you are deploying add-in in On-premises SharePoint 2013 site then it needs Server certificates along with ACS to enable High-Trust between add-in and SharePoint. These certificates will be installed on SharePoint on-premises server to enables trust between add-in and SharePoint.

The following table lists all of the possible patterns for hosting both the SharePoint components and the remote components of your add-in, along with the trust brokers that are available to you if you’re using OAuth:

SharePoint component location
Remote component location
Trust broker
On premises
In cloud
ACS, certificate
On premises
On premises
ACS, certificate
Office 365 SharePoint site
In cloud
ACS
Office 365 SharePoint site
On premises
ACS


References:

Wednesday 23 March 2016

Replace an expiring client secret in a SharePoint Add-in (Provider Hosted App)

If you register the app on the Seller Dashboardyou can set the expiration as long as 3 years. In the dashboard, you can also add new secrets when the old ones approach their expiration date. The new secret will be enabled in all instances of the app. But if you register the app with AppRegNew.aspxthe secret expires in 1 year

In order to replace/renew the client secret we need to follow below steps:
  1. Prerequisites for refreshing a client secret 
  2. Find out the expiration dates of the SharePoint Add-ins installed to the Office 365 tenancy 
  3. Generate a new secret 
  4. Update the remote web application in Visual Studio to use the new secret

1. Prerequisites for refreshing a client secret

Ensure that you have the following things installed on your local development server/computer:
  • Microsoft Online Services Sign-In Assistant is installed on the development computer.
  • Microsoft Online Services PowerShell Module (32-bit; 64-bit) is installed on the development computer.
  • You are a tenant administrator for the Office 365 tenant (or a farm administrator on the farm) where the add-in was registered with the AppRegNew.aspx page.

2. Find out the expiration dates of the SharePoint Add-ins installed to the Office 365 tenancy

  • Open Windows Powershell or SharePoint 2013 Management Shell  and run the below mentioned command:Connect-MsolService    
  • Once you run the above cmdlet a login prompt will appear, enter tenant-administrator (or farm administrator) credentials for the Office 365 tenancy or farm where the add-in was registered with AppRegNew.aspx.
  • To generate a list of all registered add-ins, run the below mentioned cmdlet:
    $applist = Get-MsolServicePrincipal -all  |Where-Object -FilterScript { ($_.DisplayName -notlike "*Microsoft*") -and ($_.DisplayName -notlike "autohost*") -and  ($_.ServicePrincipalNames -notlike "*localhost*") }
    
    foreach ($appentry in $applist)
    {
        $principalId = $appentry.AppPrincipalId
        $principalName = $appentry.DisplayName
        
        Get-MsolServicePrincipalCredential -AppPrincipalId $principalId -ReturnKeyValues $false | Where-Object { ($_.Type -ne "Other") -and ($_.Type -ne "Asymmetric") }
        
         $date = get-date
         Write-Host "$principalName;$principalId;$appentry.KeyId;$appentry.type;$date;$appentry.Usage"
    
    }  > c:\temp\appsec.txt
  • Now, open the file C:\temp\appsec.txt to see the report. Leave the Windows PowerShell window open for the next procedure, if any of the secrets is near to expiration

3. Generate a new secret

  • Create a client ID variable with the following line (Please mention the Client ID whose Client secret is about to expire)
    $clientId = 'client id of the add-in'
    
  •  Generate a new Client ID with the following line:
    $bytes = New-Object Byte[] 32
    $rand = [System.Security.Cryptography.RandomNumberGenerator]::Create()
    $rand.GetBytes($bytes)
    $rand.Dispose()
    $newClientSecret = [System.Convert]::ToBase64String($bytes)
    New-MsolServicePrincipalCredential -AppPrincipalId $clientId -Type Symmetric -Usage Sign -Value $newClientSecret
    New-MsolServicePrincipalCredential -AppPrincipalId $clientId -Type Symmetric -Usage Verify -Value $newClientSecret
    New-MsolServicePrincipalCredential -AppPrincipalId $clientId -Type Password -Usage Verify -Value $newClientSecret
    $newClientSecret
  • The new client secret will appear on the Windows PowerShell console. Copy it to a text file. You use it in the next procedure.

4. Update the remote web application in Visual Studio to use the new secret

Open the SharePoint Add-in project in Visual Studio, and open the web.config file for the web application project. In the appSettings section, there are keys for the client ID and client secret. Update the Client ID, Client Secret and add Secondary Client Secret as mentioned below:

<appSettings>
  <add key="ClientId" value="your client id here" />
  <add key="ClientSecret" value="your new secret here" />
  <add key="SecondaryClientSecret" value="your old secret here" />
     ... other settings may be here ...
</appSettings>

Now Republish the web application.

It's done :)

Tuesday 22 March 2016

"Permissions Request XML" to grant permissions at different levels to App Step

Please find the below mentioned Request XML to grant permission at different level based on the requirement:

User profile (If you want permission to User Profiles):
<AppPermissionRequests>
    <AppPermissionRequest Scope="http://sharepoint/social/tenant" Right="Read" />
  </AppPermissionRequests>

Permission at all site collections (If you want permission on all site collections within the Tenant):
  <AppPermissionRequests>
    <AppPermissionRequest Scope="http://sharepoint/content/tenant" Right="Read" />
  </AppPermissionRequests>

Full permission at site collection (If you want permission at Site collection):
<AppPermissionRequests> 
  <AppPermissionRequest Scope="http://sharepoint/content/sitecollection" Right="FullControl" /> 
</AppPermissionRequests>

Full permission at sub site (If you want permission at Sub-Site under Site collection):
<AppPermissionRequests> 
  <AppPermissionRequest Scope="http://sharepoint/content/sitecollection/web" Right="FullControl" /> 

</AppPermissionRequests>


Note: 
  1. Copy paste the above given XML as it is. Do not replace "Scope" value.
  2. Replace the "Rights" value with your required role: Read, FullControl, Contribute, etc.,

Tuesday 15 March 2016

SharePoint 2013 workflow template is not enabled in SharePoint 2013 deisgner

First, we have to install and configure Workflow Manager for SharePoint 2013 Farm. Click here to Install and configure the Workflow configuration wizard based as required.

Second, We have to run below mentioned Powershell command in SharePoint 2013 Management Shell:

SyntaxRegister-SPWorkflowService –SPSite –WorkflowHostUri -ScopeName [-PartitionMode] [-AllowOAuthHttp] [-Force]

Example
1. Without SSL
Register-SPWorkflowService –SPSite "http://Mysharepoint2013" –WorkflowHostUri "http://Mysharepoint2013:12291" –AllowOAuthHttp -force

2. With SSL
Register-SPWorkflowService –SPSite "https://Mysharepoint2013" –WorkflowHostUri "https://Mysharepoint2013:12290" –AllowOAuthHttp -force


After running powershell command Go to Central Admin --> Application Management --> Manage Service Applications -->Workflow Service Applications


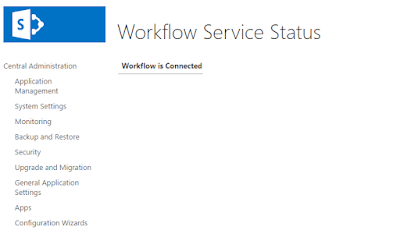
Now if you see "Workflow is connected" then close the designer and reopen the site in designer and check, "SharePoint 2013 Workflow" template will be available.


-Happy SharePoint

Wednesday 9 March 2016

How to generate .ascx.g.cs file manually

Please find the below steps to generate .ascx.g.cs file manually for your Visual webpart:

  1. Ensure the project's site URL is specified correctly and it's valid.
  2. Go to your Visual webpart  => expand the visual webpart file => right click on .ascx file => click on Properties => Update the "Custom tool" to "SharePointWebPartCodeGenerator".
  3. Right click on .ascx file and Click on "Run Custom Tool".
  4. Go and check, your .ascx.g.cs file will be generated.
Hope these steps solved your issue. Happy Coding.

Total Pageviews